Show your own chips
UHT comes with a set of chips that look fine. But if you own a nice clay set, showing those on the display makes the whole thing feel like your game rather than a generic timer — and when a break says "colour up the greens", players can see exactly which chip you mean.
You'll need photos of your chips. A phone snap on a plain table is enough.
Prefer to watch? Import your chips in 2 minutes covers this page in a few minutes.
Where to find it
The importer lives in the tournament wizard, step 7 — Chip Denominations & Design, on the right-hand side under Chip Design.
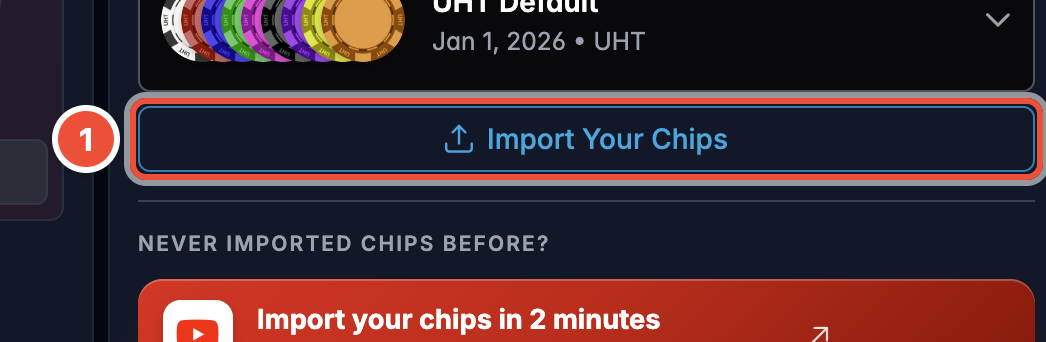
Click Import Your Chips.
Two ways in
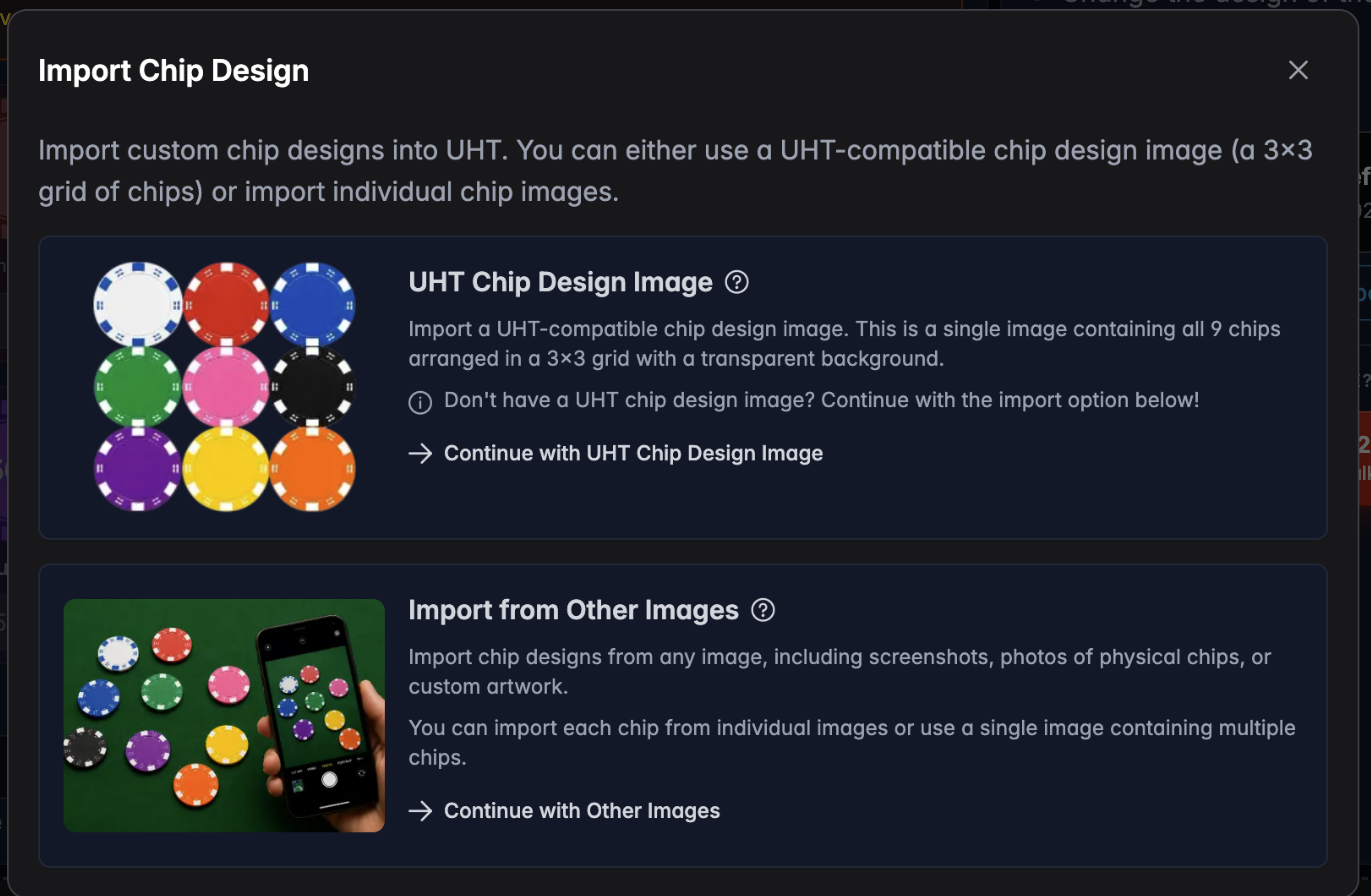
UHT Chip Design Image — one image holding all nine chips in a 3×3 grid on a transparent background. This is what you'd use if somebody sent you a ready-made UHT chip set, or you made one in an image editor.
Import from Other Images — anything else. A photo of your chips on the table, a screenshot, artwork you drew. This is the one nearly everybody wants, so take this path if you're unsure.
Importing from your own photos
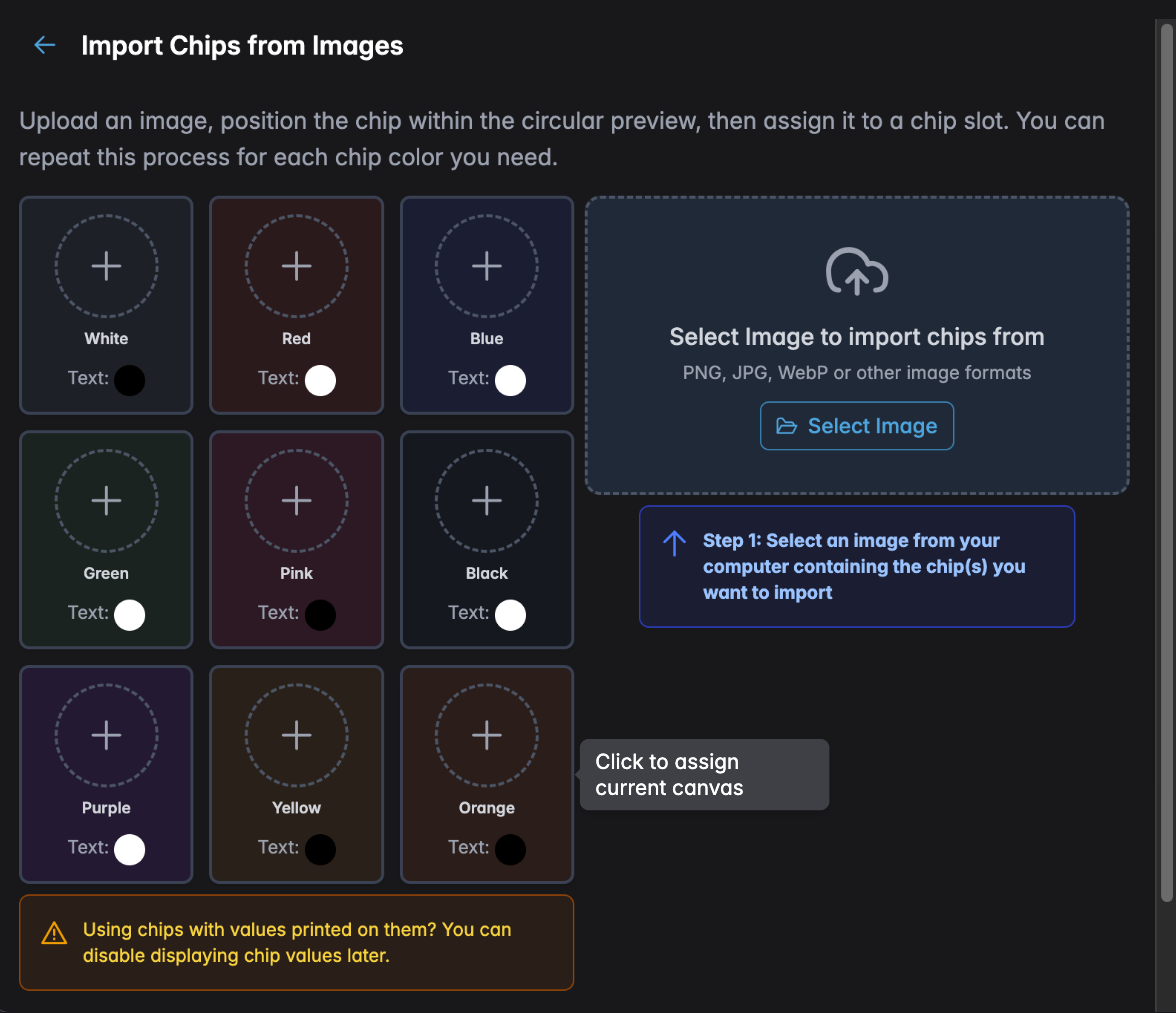
Nine slots down the left, one per chip colour: white, red, blue, green, pink, black, purple, yellow, orange. You do not have to fill all nine — only the colours you actually own. The rest keep the default artwork.
The names are just labels for the slots. If your "white" chips are cream, they still go in the white slot.
Step 1 — pick an image
Press Select Image and choose a photo. It can contain one chip or all of them; you'll crop to one chip at a time either way.
Step 2 — frame one chip in the circle
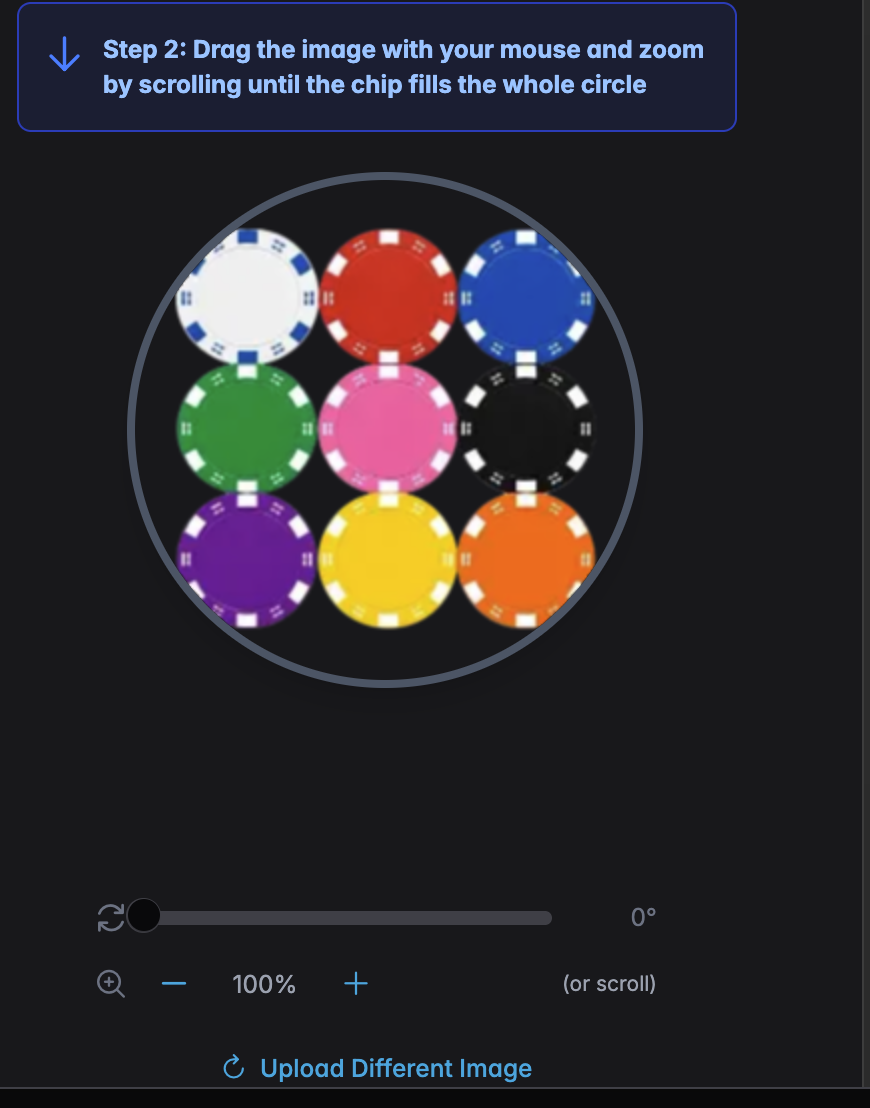
Drag the image with your mouse and scroll to zoom until one chip fills the circle. The circle is exactly what ends up on the display, so:
- Get the chip's edge close to the circle's edge. Too far out and your chip looks small and lost on the display.
- Use the rotation slider underneath if the photo was taken at an angle and the chip's pattern looks tilted.
Step 3 — assign it to a slot
Click the chip slot on the left that matches. The cropped chip drops into that slot.
Repeat
Reframe the circle on the next chip and click the next slot. Same photo, different crop — no need to re-upload. If your chips are in separate photos, hit Upload Different Image between chips.
Tips for photos that look good
Shoot straight down. A chip photographed at an angle is an oval, and it stays an oval on the display.
Plain background. Green felt or a plain table. Busy backgrounds show up around the edge of the circle.
Even light. Daylight, no flash. A hard flash blows out the middle of the chip and loses the pattern.
One chip per crop. Resist getting a neat stack in shot — the display shows one chip face per denomination.
If your real chips already have their value printed on the face, switch the value overlay off so UHT doesn't print the number on top. That setting is Chip Value Display Position on the same wizard step — set it to hidden.
After importing
Back on step 7, switch Display Chip Denominations on and type the value each colour is worth. Those values are what players see, and what colour-up instructions refer to.
Only chips with a value above zero appear on the display, so a colour you own but don't use this evening simply stays hidden — no need to delete it.
That depends on the design you pick in step 8. A design without a chip denominations component can't show them. If that's the case, UHT tells you on the design step — nothing breaks, the chips just aren't drawn. See Display designer for adding them to a design yourself.
Next steps
- Getting started — the full tournament walkthrough
- Display designer — put the chips where you want them
- UHT account benefits — keep your chip set across devices