Layers — different screens for different moments
A condition hides one component. A layer swaps the entire display.
Press the layers button next to Active Layer:
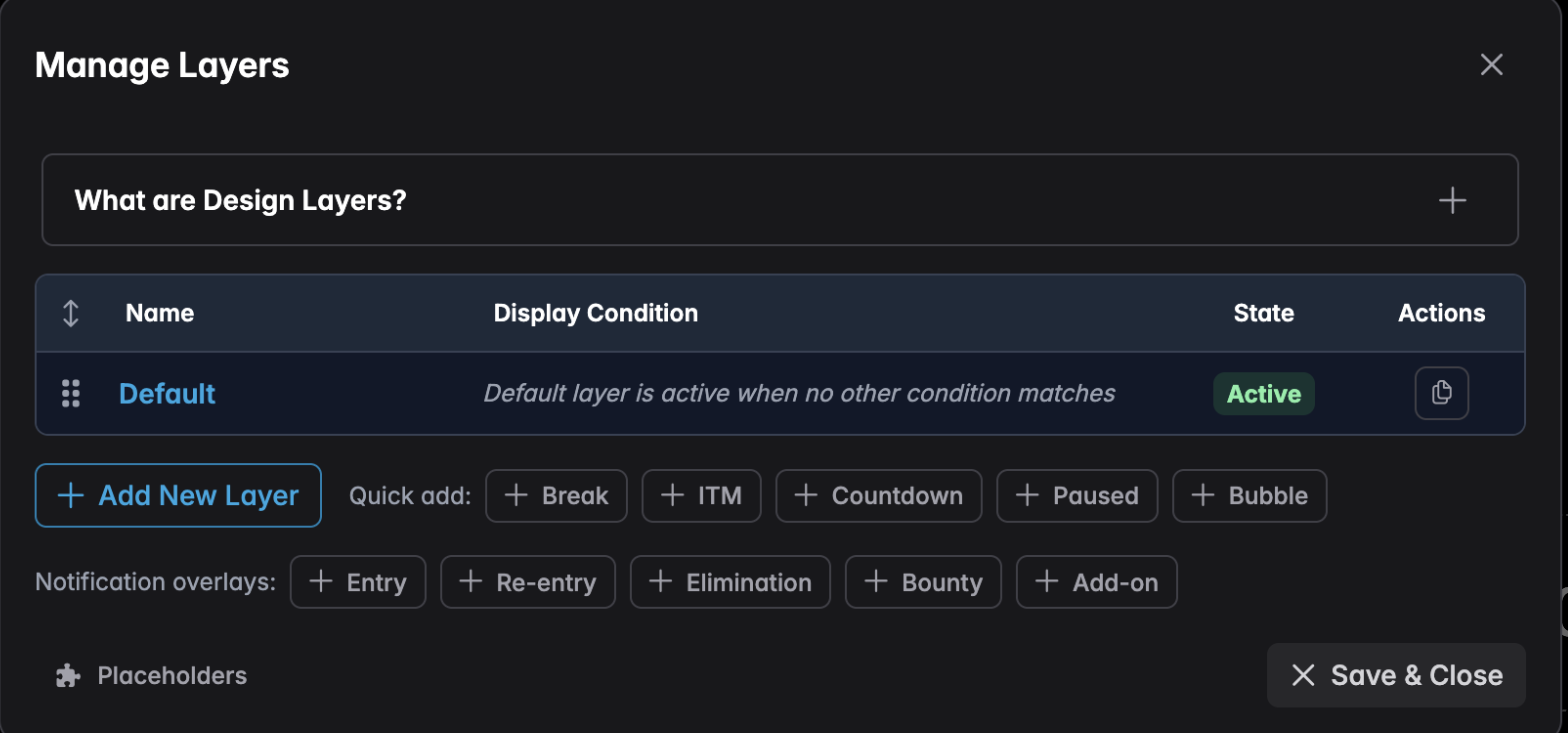
Each layer has its own condition. UHT works down the list and shows the first layer whose condition is true. The Default layer sits at the bottom and is used when nothing else matches.
The classic use is a break screen: a layer with the condition
{{current.level.isbreak}} = "Yes" holding a big "BREAK — back in 15 minutes" message and
nothing else. During the break, players see that; the rest of the time they see your normal
display.
Quick add builds common ones for you with the condition already filled in: Break, ITM (in the money), Countdown, Paused and Bubble.
Notification overlays
The second row adds notification overlays — layers that appear briefly when something happens, then disappear:
- Entry — a player buys in
- Re-entry — a player buys back in
- Elimination — a player busts
- Bounty — a bounty is collected
- Add-on — a player takes an add-on
These are what make a display feel alive. A player gets knocked out, and a message flashes up naming who did it, then the display goes back to normal.
This is the part that catches people out. A notification overlay layer never shows on a normal, single-screen display. It only surfaces on a screen connected through multi monitoring, and it replaces UHT's own built-in notification for that event.
So if you build an ELIMINATION_OVERLAY layer and nothing ever happens, that's why — it's waiting for a connected display. On a single screen, everything else works as usual; only the overlay stays hidden.